Wednesday, August 26, 2009

Chain Link Crochet Conference: SPARKLY


CGOA's 15th annual
national Chain Link conference, held Aug. 5-9 in Buffalo, NY was simply amazing. I have so much to blog about it that I haven't known where to begin. In the meantime I uploaded photos and tweeted about it. My tweets always show in the right hand column of this blog.

I love the anniversary theme: Crystal Jubilee! It inspired me to crochet a special bling coffee cozy in case Buffalo had great espresso.

In fact maybe I loved the theme a little too much :) Each time I pack for a conference I get a little crazy. I suddenly invent projects that make me pack too much yarn. This year I threw together materials for crocheting a variety of Crystal Jubilee Tiaras, in case I found the time during the conference, LOL. (I never did.)

At the last minute
on my way to the airport, I made this Crystal Jubilee Bracelet (turns out it's a 20-minute project). Later at the conference
I crocheted a bangle version with glittery Jelly Yarn in honor of Mary Beth's birthday (see end of Tracie's blog post about the Chocolate Bar birthday; also see Dee's pics). I'm crocheting the birthday bangle in this photo taken at the Friday evening annual members' meeting. You can kind of make out the big pink crystals. It makes Little Loopy's eyes twinkle.

Speaking of twinkling eyes, how could I not wear new eye bling for the occasion? My
rainbow glitter eyeliner was so sparkly that along with the bracelet, folks at my dinner table nominated me for the Bling Contest!

See
Dee Stanziano's post for the best play-by-play of the contest. Basically, at the Fashion Show dinner each dinner table seated about 8 people. The people at each table nominated the person at their table who displayed the most bling. These nominees went on stage together and then voting by applause began. Congratulations to First Prize Winner Joan Davis!

All this
Crystal Jubilee talk might be ringing a bell if you saw my last-minute pre-conference blog post about the silk vest. I'm happy to report that a) I completed it! I was weaving in the last ends at the dinner table; and, b) so many people asked for the pattern that I'll have some good photos when the pattern's ready. You might get an overall sense of it from this conference photo. Also, c) turns out it that embroidering crystal beads all over it would have been overbling, so it's a good thing I had the bracelet and eyeliner to ramp it up a notch, tastefully ;)

Sunday, August 02, 2009

Just Back from the Craft SuperShow in Orlando!

Good thing I brought my camera! Here are some pics from the Craft SuperShow, a Craft and Hobby Association (CHA) event that was open to the public. All photos were taken on July 31.

The highlight of the day for me was when I discovered that Todd Paschall was there with some of his amazing crocheted portraits! I've been following Todd's posts in online crochet forums for years. It was fabulous to finally meet him in person.

My son had Obama in stitches (har har).

The Mary Engelbreit booth was mobbed. I was able to snap a pic of some Mary Engelbreit crochet.

The whole show was
mobbed actually! We had Disneyworld-like lines of people waiting to pick up their pre-registered tickets!! The show organizers were great at keeping the line moving quickly. I loved seeing so many people interested in crafting.

Another highlight of the day was finding out that one of my new designs is coming out soon. A photo of it being modeled was projected on a big screen. Why oh why didn't I take a photo of it?

You can see more photos from the big event in my Flickr album. You'll see some new crochet and knit fashions for children. I remember also seeing great new patterns for wraps and shawls and afghans and throws but didn't get photos of those.

Isn't it funny how you can be holding a camera in your hand and not think to use it? Except for when you do?

Saturday, July 18, 2009

Silk Crochet for the CGOA Conference

I'd better stop what I'm doing and blog now, before I get even busier! My dream is to have something really special to wear to CGOA's Crystal Jubilee 15th Anniversary festivities at the Chain Link conference in less than a month.

I finally decided what I want to crochet with my Tess Yarns Cascade Silk stash yarn: a luxe waistcoat-type garment.

I'm starting off with Tunisian Simple Stitch for the bodice, worked in one piece. I sketched out a paper pattern and am shaping as I go. The right front and armhole of the bodice are completed so far. I'm enjoying the shaping experiments. And, the feeling of silk flowing through my fingers :)

Next will be a marathon swatching event in which I try to create the exquisite edging that I picture in my head, bordering the whole bodice. I did something similar when I designed this published tunic, but I'm picturing a new kind of edging for this silk waistcoat. ::crossing fingers that it will only take 1 afternoon of swatching::

After that, somewhat long panels cascading from the bottom edge of the bodice; their length and specific shape to be determined later. I may embroider the bodice, I may not. Crystals may also be involved, or not.

Actually, the dream is to have something special to wear every day that I'm there but if all I manage to complete is this silk waistcoat, I'll be jubilant.

Monday, June 22, 2009

Tunisian Crochet Chemo Hat: Pros & Cons

In the midst of hosting house guests and attending the TNNA conference, a new crocheted hat happened, known as "Vanilla Crown." Early in this blog's life I talked about "Hat Yoga": a hat designing journey for my dear friend Kalli.

The Vanilla Crown is the latest addition to the Hat Yoga collection and the first to feature two tunisian stitches for specific reasons.

We're having a heat wave here, and my house guest is not used to the extremes of air conditioning and humid subtropical heat. After all the chemo she's had, she doesn't need the extra stress on her immune system. So I wanted to create a summer hat that breathes but protects, and is of course exquisitely soft. I chose Decadent Fibers' organic color-grown cotton in "vanilla".

I've watched some of my hats stretch out over years of use. Sometimes it's due to the yarn, sometimes the stitch or gauge. For this hat I focused most on which stitch and gauge. The yarn is bumpy and fleecy and for it to be summery, I wanted a stitch that wouldn't amp up the bump, thickness, or weight; and one that wouldn't add stretch. My thoughts turned to tunisian crochet.

I wanted to frame my friend's face with a gently flaring brim that wouldn't droop over time. I thought of how tunisian simple stitch (TSS), worked firmly, naturally curls. It's also solid enough to block the sun.

As for what I was in the mood for: I was not up for doing tunisian in the round, nor entrelac. I needed something mindless enough so that I could socialize while crocheting. We also like to watch movies together. I was willing to commit to crocheting a rectangle, then seaming it to create a hat band with just the right fit before adding the brim and crown.

So here's what I think of the result based on the design goals:
  • I'm very happy with the tunisian corded knit stitch used for the band. It has zero elasticity horizontally (around the head) and just enough vertically so that the wearer can pull it down over the ears or not.
  • The stitch is also pleasingly protective yet airy, and shows off the yarn's texture without adding more bulk. It's a great stitch to design with.
  • Using TSS for the brim is also a good choice, once I worked out the amount of increases to add so that the brim flared just enough. (I ripped out these rows so many times before getting them right!)
  • The yarn is even more beautiful than I expected. It's soft, luminous, and great with different skin tones. I couldn't resist adding some pearls around the crown!
Those are the pros, want the cons? Well:
  • I ended up using 4 different kinds of hooks. This is a problem designing with tunisian. Sometimes you don't know what you're in for until you're part way through a new design! I discover missing sizes and styles once I need one while designing :)
  • My favorite tunisian hook was barely long enough for the rectangular band. Once I added stitches for the brim, I struggled to use my favorite hook but eventually switched to some new bamboo circulars, which I didn't like. For the crown I could use a regular crochet hook, but kept switching it because the yarn worked distinctly better with one brand over others.
  • I underestimated how much the finished crown affects the way the band settles around the head. That's not this design's fault, just a design issue I learned the hard way. And in this case the hat still fits fine, just not the way I originally envisioned it; it was meant to be a "bucket" hat and became a "cloche."
  • Lastly, seaming is not my first choice for a hat design. The seam did its job of making the hat enjoyable to make while socializing, so I would make a hat this way again in a similar situation. The seam, which is crocheted, looks okay except for a lumpy bit at the brim, but it doesn't really show.

Saturday, June 06, 2009

How to Increase Crochet Stitches Like a Pro

2018 Update: I've incorporated this blog post into a newer one.

I wonder how many crocheters are aware of small refinements they can make at row edges to improve an angular shape, such as a triangle?
I wasn't aware of it myself until I designed the trapezoidal "Swingy Ruffles" bag for a Jean Leinhauser and Rita Weiss book in 2006. My first swatches resulted in rounded blobby shapes. No matter how dramatically I increased and decreased stitches in each row to create diagonal lines, the row edges restricted the shape.

As you can see in the photo above, the left and right edges of the yellow-green swatch are too tight, causing the top edge to bow outward. (These are Tunisian crochet swatches; see mini photo tutorial below.
Rosepuff Shawlette (regular crochet): a wide, shallow triangle.
Its edge stitches need extra room to spread wide.
The simple, obvious solution for regular (non-tunisian) crochet is to add a turning chain or two to loosen up the row edges, and it works. 

Diagonal lines that are created by steadily increasing or decreasing stitches in every row need room to flex and breathe

This is especially important for fashion crochet! Some elegant garments depend on the drape of truly angular edges for their dramatic flair.

Maybe you knew this already. If so, let me know if you've found advice like this in crochet books or sites because I like to alert crocheters to sources of great information.

Tunisian Crochet Edges
This became the Eilanner Shawl!
What about corner-start tunisian crochet? I'm currently designing a triangular wrap in which you begin at the bottom corner of the wrap and steadily increase at each edge to create a big triangle. In Tunisian (a.k.a. "afghan crochet") there is more than one way to add stitches at the beginning and end of a row. 

The common squeeze-in-a-stitch method works okay except in cases where you are increasing a lot. That's the case with the swatches in the first photo: I increased at each end of every row.

Adding stitches repeatedly has a momentum to it, a vector. A small momentum can be absorbed by the stretch of the fabric, but a greater momentum needs room to fully expand. Shell stitches have this momentum too.

A way to look at it geometrically is that when we crochet a square with the same number of stitches in each row, the rows stack up in columns. Stitches fill their little slots. When we (more rarely) start in a corner and increase in each row for a while to make a triangle, and perhaps then turn it into a diamond by decreasing every row until it comes to a point, each added stitch at the edge is actually launching off on a diagonal angle.

How to Do It
From the Symmetrical Diamonds free pattern.
Here's a way to steadily increase stitches in Tunisian simple stitch that helps the increase stitches do their shaping job (like the bluish swatch in the 1st photo). You'll see a wee photo tutorial when we get to the left edge. I've been experimenting with it this week, using different gauges and fibers. I like that:
  • it has enough flexible drape for fashion designs
  • it's substantial enough to support an added edging later
  • the left edge and the right edge have equal tension and look equally nice to me (a tricky thing for Tunisian crochet!)
To increase 1 stitch at the beginning of a forward pass, chain 1, insert hook in first vertical bar and pull up a loop to create the added stitch; then continue across the row, pulling up a loop in each vertical bar across. So far, so what, right? No surprise maybe? Some crocheters already increase by working into the very first vertical bar instead of skipping it. 

I recommend that you chain 1 first. It gives a more flexible edge, especially if you will be adding more increases to this edge in each row. It seems to control the tension of the first stitch. To my eye, the chain melts into the diagonal edge and adds a little substance.
Photo 1 of 3.
To increase 1 stitch at the end of a forward pass, I borrowed a stitch from macrame called a Half-Hitch Knot; in knitting it's known as the Simple Cast-on (or Backwards Loop Cast-on). In my testing, two half-hitches added to the hook at the end of the row work great as one increase

If you add only 1 half-hitch, it's a flimsier loopy edge. I'm unable to find a video that would show you how to do a half-hitch while happily crocheting along, so until I create one I hope my 3 photos help. It's cool. I enjoy crocheting half-hitches. I like what they look like.
Photo 2 of 3.

How to make a Half-Hitch: Your goal is to add a loop onto your hook that has a twist in it so that it stays on your hook. All I do is instead of doing a usual yarn over with the strand of yarn from the finger controlling the tension of the yarn, I yarn over with the strand behind my tension finger. I "scoop" it from the palm of my hand. I know, sounds weird, and a little video would clear it up instantly! 

In photo 1 of 3, I added two loose half-hitches to the hook at the end of the forward pass. In photo 2 of 3 I simply tightened them. Aren't they cute?
Photo 3 of 3.

How to crochet the return pass with the half-hitches: yarn over and pull through both half-hitch loops on hook (counts as 1 increase stitch worked off of hook), yarn over, pull through two loops on hook at a time until one loop remains on hook. 

Tip: It might help you later to put a stitch marker in that pair of half hitch loops.

In photo 3 of 3 you can see what the two half-hitches look like now that I've pulled the yarn through them to begin the return pass.

What About the NEXT Row?
Crochet another forward pass of Tunisian simple stitch; start it with an increase like the row before. When you get to the end of this new forward pass, insert your hook in both end loops of the half-hitch pair. Then increase by making another pair of half-hitches.
When half-hitches are used to augment a widening left edge, you can see how they'll blend into the edge in a slightly bumpy, pretty way, and match the look of the chain 1 edge on the right edge. 
Below I've added a quick edging.
I've added a simple edge: a quick slip stitch + chain 1 in each row end.
I hope that you'll try this and let me know what you think. If you've learned about this elsewhere, please tell me about it.

Saturday, May 30, 2009

Crochet Foundation Stitches: A Beadwork Tip

Note: In the course of writing this post I explain two projects: a child's "hippie" headband and a hemp teacher's bracelet. They help me illustrate a new crochet tip, so I've turned them into simple free crochet patterns. I've put them into classic pattern format on my ToyDesigningVashti blog.


pictured: swatch of 5 heights of foundation stitches (no base chain used)


If you crochet
with beads, you know there's a list of things to keep in mind:
  1. The beads tend to fall to the back of the crochet stitches
  2. The bead hole needs to be big enough for the crochet yarn/thread & needle
  3. The beads often need to be strung onto your yarn in a certain order before crocheting
  4. Non-round beads may settle into a crochet stitch at an unintended angle
Today's post is about #4. Yes, for those of us who have ever tried to....
  • Line up alphabet beads just so (see 2nd photo)
  • Make smiley beads look you straight in the eye, not tilt toward 3-o'clock or worse
  • Have oval or tube-shaped beads lie horizontally instead of on a vertical angle
....Foundation crochet stitches can help! The Foundation Single Crochet stitch has also been called Foundationless Single Crochet, Chain-Free, Chainless Foundation, Double Chain Stitch, and Base Chain Single Crochet. I've blogged about them and designed with them. They're becoming hot additions to a crocheter's toolbox for at least 3 reasons besides bead crochet. They:
  1. Eliminate the need to crochet the first row of stitches into a foundation chain (something I've never enjoyed!)
  2. Are fabulous for fashion crochet because the starting edge of your garment is much more elastic (a big thank you to Doris Chan for teaching me this years ago)
  3. Result in a stronger, nicer cord (or purse strap, for ex.), of any desirable width, instead of plain chain stitches
  4. Are structured of vertical and horizontal strands that are easily beadable, unlike standard crochet stitches
(3rd photo: "Lunar Window" designed for House of White Birches in 2005, using foundation stitches of varied heights exclusively)

If you've been following me in Twitter, you know that I recently made small items with my fourth grade
r that his classmates can purchase with school dollars at their "Mini-Mall" event.

We settled on a '70's hippie theme and so I brought out my stash of hemp cord, rainbow yarns, and hippie-looking beads (smileys, peace signs). My son's first thought was "headbands"! My first reaction was, "Sure! Quick and easy,
if I use foundation crochet stitches."

I simply did 45 fsc with medium-weight yarn and an I (5.5mm) crochet hook, slip stitched the ends together, and added colored wood beads to the two yarn tails (no weaving in ends). See what I mean? Get out of here with that "work a row
of single crochets into a foundation chain." So old school.

Now let's add tricky beads. I made beaded hemp bracelets for a few teachers (using shank buttons as beads). I had to string them on before crocheting so that they were all facing the same direction. As you can see in the photo, you wouldn't want a peace sign or smiley sideways or upside down; the sunglasses would have ended up sideways in a standard single crochet stitch.
Show Tricky Beads Who's Boss

Here's the step-by-step on how to crochet 'em in, using the actual bracelet pattern I created:

String 6 beads onto hemp string so that they face the same direction. String on a 7th larger bead to serve as a clasp button.

1. Chain 1, slide large bead up close to hook, chain 1 (1 beaded ch
ain made), insert hook in 1st chain made, yarn over and pull up a loop, ch 1 leaving 1 loop still on hook (this becomes the "foundation chain" of the next sc you'll make; pinch it with your fingers or place a stitch marker there), yarn over, pull loop through both loops on hook (single crochet made).

2. Insert hook in the next marked (or pinched) stitch, yarn over and pull up a loop, chain 1 leaving 1 loop still on hook, mark it, yarn over and pull through both loops on hook. You have now made 2 fsc.

Notice that when you make each fsc, first you make a chain and the 3 yarn strands of the chain will run horizontally along the row of fsc when you're done. When when you complete the single crochet part of the fsc, two roughly vertical strands, which are often called the two "legs" of a crochet stitch, can be seen on the front side of the stitch. Also created are two horizontal strands that are found at the top edge of every kind of crochet stitch. It is difficult and sometimes impossible to place beads on the top two horizontal strands, but you can easily place beads on a leg of any crochet stitch (they end up on the back). With a fsc, you can also easily add beads to the horizontal strand running under the stitch legs.

3. To bead a leg of the next fsc: Pull up a loop in the next marked stitch, chain 1 and mark it, slide up a bead close to the hook, yarn over and pull through both loops on hook. You have now made 3 fsc.

4. Work another plain fsc like in step 2.

5. To bead a lower horizontal strand (the chain part) of a fsc: Pull up a loop in the next marked stitch, slide up a bead close to the hook, chain 1 to make a beaded chain, mark it, yarn over and pull through all loops on hook. You now have 5 fsc.

In 5th photo, only the "u" alphabet bead on the far left is readable. That one is on the lower horizontal strand of the chain part of the stitch. The other 2 beads are on the back "legs" of the stitches.

6. Continue working a plain fsc, then a beaded fsc, until you've used all strung beads.

7. Work 2 plain fsc.


8. To make a buttonhole for clasp, chain 2 then work a fdc, ready? yarn over, insert hook in marked stitch of last fsc, pull up loop, chain 1 leaving 3 loops on hook, yarn over, pull through 2 loops on hook, yarn over, pull through last 2 loops on hook. Fasten off. Add small wooden beads to each yarn tail. (Last photo shows only 5 small beads; I think 6 is better)

I'll be uploading more photos to the ToyDesigningVashti blog and creating some Ravelry pages for these free crochet patterns.

Friday, May 22, 2009

Fun With Tunisian Crochet (a.k.a. "Afghan Stitch" or "Tricot")

Although I learned how to do tunisian crochet as a young child, I spent most of my years thinking of it as pretty much just one stitch. I wonder if others have too. That basic tunisian stitch, the Tunisian Simple Stitch (or TSS) is certainly special! (see 1st photo)-- but it's only a hint of what's possible.

I wonder what stitches haven't been discovered yet! I crave complete sets of tunisian hooks that haven't been invented yet! I fantasize about different stitches in weird or unexpected fibers! (for example, third photo below is batik fabric strips in tunisian. My friends prefer this side, usually called the "wrong side")

It wasn't until I started designing professionally
 that my creative imagination woke up to tunisian crochet.It's a rich alternate universe. Learning how to publish downloadable crochet patterns egged me on because now, tunisian crochet patterns can have space for step-by-step photo tutorials and other helpful information that might take up too much room in print media.

Yes, I have the tunisian fever and have been developing some new designs. For example, tunisian crochet roses (2nd photo). Another uses what might be a new tunisian crochet stitch, which I call "Wicker Stitch." (last photo below)

I'll be announcing new tunisian crochet patterns here as soon as they're professionally edited. I have my own storefront for downloadable crochet patterns set up in Ravelry now. I'll be making them easily available in other places too.

I'm inspired by these books, designers, and designs:
Two great forums:

Fabulous for learning about Tunisian Crochet:

Friday, May 15, 2009

How to Journal About Your Crochet Ideas

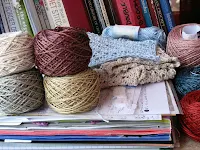
Can you find my notebook in this project pile?

We crocheters are a creative bunch. With all the fresh yarn colors, new crochet hooks, free crochet patterns, and exciting crochet fashions on the runways, some days my problem is too much inspiration! A crochet notebook really helps. 

Do you already record your crochet inspirations somehow? If so, you know that there's more than one way to go about it. 

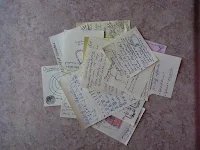
I used to use sticky notes of all sizes and then throw them into folders. 
I liked this because each design idea remained independent and
 recombinable; they were also easy to jot down anywhere at any moment. I still have sticky note pads in every purse, car, and throughout the house so that no inspiration is ever forgotten. 

The sticky note system is not ideal. I didn't like it because the ideas were less likely to evolve. They tended to remain just sparks, or seeds still needing to be planted. (Of concern to professional designers: no built-in intellectual property protection!)

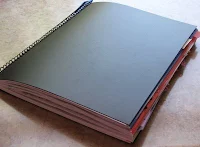
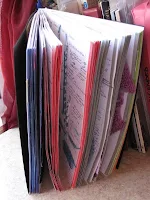
I love my 8.5" x 11" thick spiral-bound blank notebook by Miquel Rius. I found it at the local Barnes & Noble. Its durable hard plastic looks good and protects well. The pages have faint graph paper lines. 

Here's my basic system:
  • I number each page consecutively in ink.
  • I reserve the 2 back pages for indexing by page number. 
  • Each entry is in ink, dated, and initialed by me. 
  • If I had to jot down something on a sticky note or scrap paper, it gets firmly taped into the notebook as a signed and dated entry. 
  • No pages are ever ripped out.
I know what you're thinking: seems a bit formal. Hold that thought.

Other things that go into this notebook: 
  • sketches, diagrams
  • inspiring clippings
  • samples of crochet stitches and patterns 
Not all of my swatching fits into a bound book like this but it's the ideal place to keep my thread crochet lace pieces. For sketches I've learned to keep colored pens nearby. Some ideas are just plain better drawn than written. Years later I especially enjoy looking at my quick sketches, even those that didn't seem like much at the time. 

At first this was a big change and did seem a bit formal to me, but it's an easy habit and well worth it. It's a fertile garden where I can watch the seeds that I've planted grow over time. The entry dating turns it into a lovely memory book. I love just paging through this notebook. A big bonus is that all of these steps help to protect my ideas as the intellectual property that they are.

Sometimes while crocheting I jot down into this notebook seemingly random thoughts or opinions I have that are in any way related to crochet--maybe about the yarn or hook or pattern or color I'm using. Later, these thoughts become useful. 

It's good for crocheters to recognize that what we naturally do generates intellectual property! Below are some links to descriptions of how design notebooks are used in other fields. I hope you are inspired to record your crochet stitches, experiments, observations, and daydreams.

I love seeing how Paul Hughes thinks in diagrams and sketches
College-level guidelines for creating design process notebooks, including graded evaluations, here and here